Posts filed under Tips'n Tricks

Create An 802.1x Evil Access Point

The last couple of weeks, I've been playing with Kali Linux to explore exploits on networks (wireless and switched networks). One of the exploits I'd liked to explore was that of an 'Evil Access Point' which can be done with Kali Linux and a suitable wireless LAN adapter.

An Evil Access Point creates an wireless network SSID to lure unsuspecting users/computers in to connecting to it. This network is pretending to use 802.1x for security (which is mainly used in corporate network environments), and those networks require typically a username and password (or certificate) to connect.

When the user/computer tries to connect, it (the evil AP) collects the user-name and a hash of the password. The password can be recovered by using dictionary files, rainbow tables, or by using brute-force. After the password has been found it can be used with the captured user-name to connect to the corporate network.

Posted on April 12, 2015 and filed under Security, Tips'n Tricks.

Log Conversation Only with TCPDUMP

Not exactly the conversation view from Wireshark, but it's a relatively clean and readable output showing the source, destination IP addresses, and ports.

tcpdump -q -i <interface>

Add the '-t' switch to remove the time stamp as well

Posted on March 27, 2015 and filed under Tips'n Tricks.

OS X Yosemite DHCP Server

This week I re-installed my Mac Mini server at home. It still ran Snow Leopard, and it was time to start with a clean slate. So after a couple of hours of pondering if I had forgotten to backup something, I started with a clean install of OS X Yosemite (10.10).

Everything went smooth, until I started using the DHCP service that comes with the Server App add-on.

My server uses 802.1q (VLAN-tagging) to connect several different VLAN's which I feed into several Virtual Machines. So I also use several DHCP Scopes for those segments.
The IP addresses for these scopes are all in the 192.168-range (class C subnets), so when I created the scopes I had to go through a simple wizard in the Server App. I just had to fill-in the blanks (very user friendly), and OS X did the rest.

Upon testing I ran into the weirdest behaviour on my network. Getting connectivity with a device took a very long time, and when the device got an IP address, it was from a different network (???)> So it couldn't communicate across the network.

At first I began to wonder if I had mixed up the VLAN names and tags, but those were correct. After an hour of troubleshooting (more and more DHCP clients were failing in the network), I found the problem;

When you create a scope Apple will assign a default subnet mask (255.255.0.0). I guess I should have seen it, but I didn't.

After I changed the subnet mask in the DHCP scopes everything went back to normal.

Lesson learned: Don't rely on wizards and other user-friendly stuff.

Posted on December 31, 2014 and filed under Apple, Annoying, Tips'n Tricks.

PlayStation Network Down and How To Get It Working Again

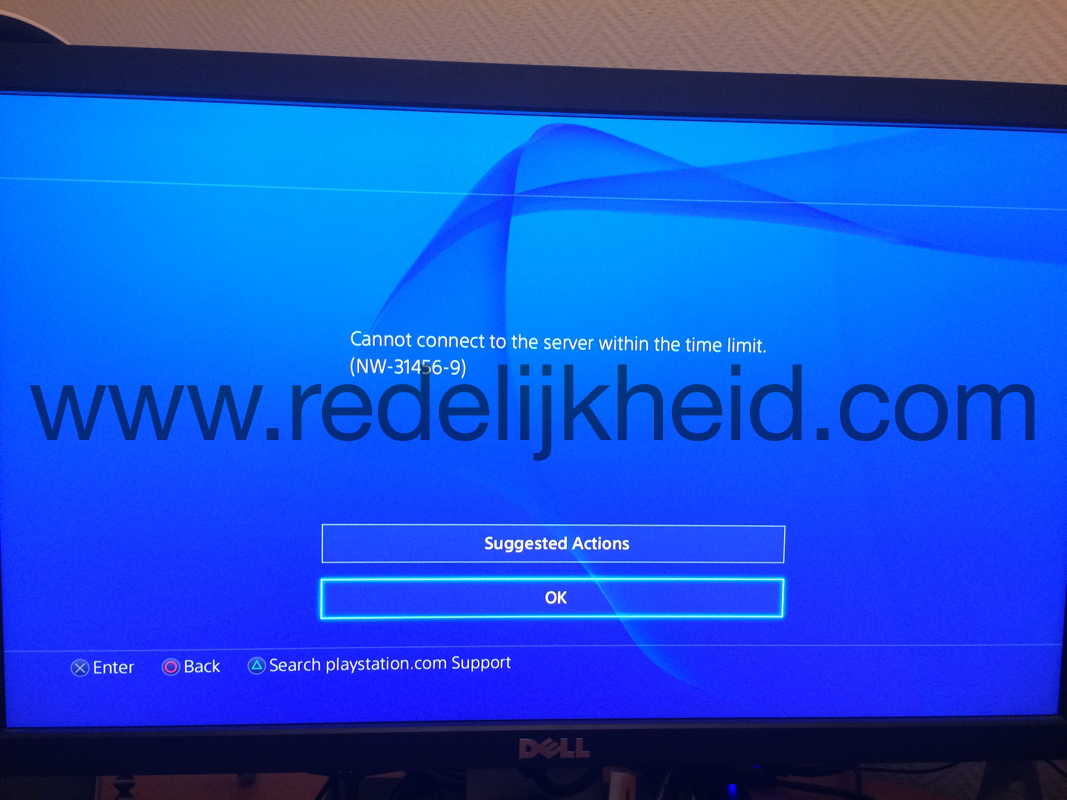
This Christmas (2014), several gaming networks were attacked by a DDoS. One of those networks being the Playstation Network (PSN). This resulted in severe downtime during the holiday season. Sony is/was working hard to resolve this and service is being restored all around the world. Except for me (and probably several thousand other gamers). As of this morning (December 29th, 2014) I was unable to log on to PSN. All I got was one of the much telling error codes:

NW-31456-9

CE-33987-0

Someone on the Interwebs mentioned that a change in the MTU size might help. The MTU size is the maximum transfer unit on a network, which is normally at 1500 (bytes) for regular network clients. In some case it's preferable to adjust this size (I won't get into details).

In the case of PSN being down, an adjustment from 1500 (the default) to 1473 seems to do the trick at the moment. Not sure if it wil hold up in the (near) future, but at least you can get online to play on your new Playstation 4 or with the new game you got for Christmas.

  1. Go to the “Settings” menu.
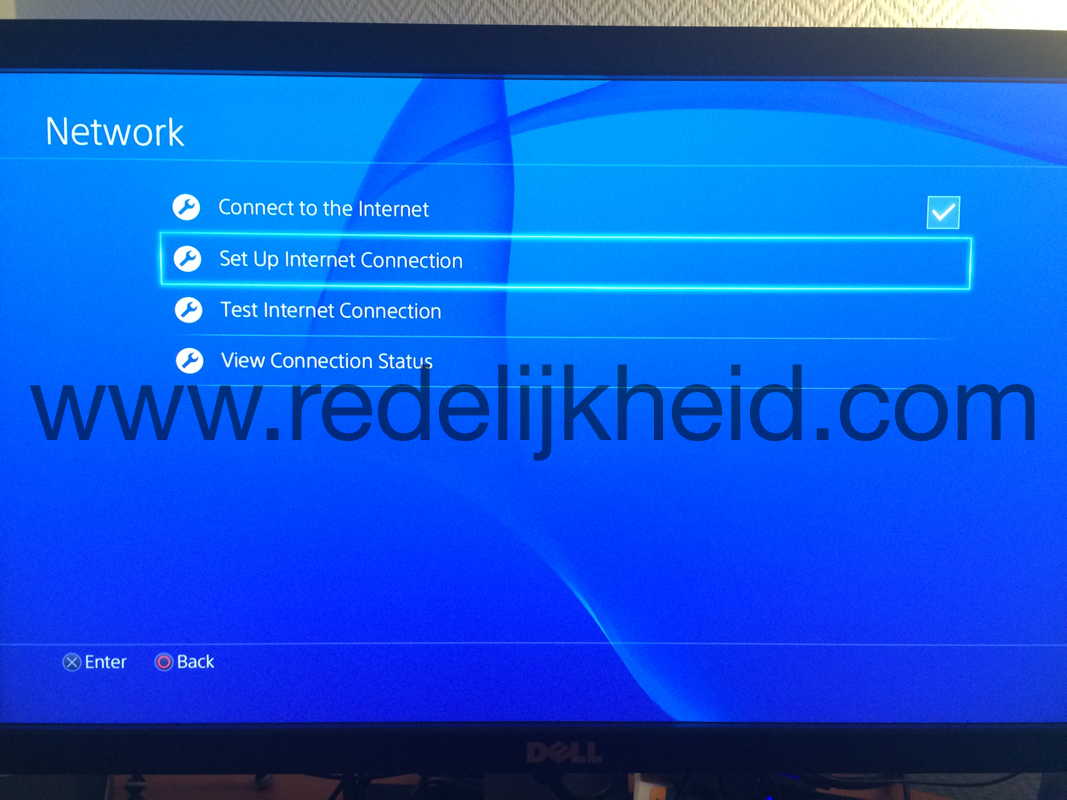
  2. Go to “Network” sub-menu.
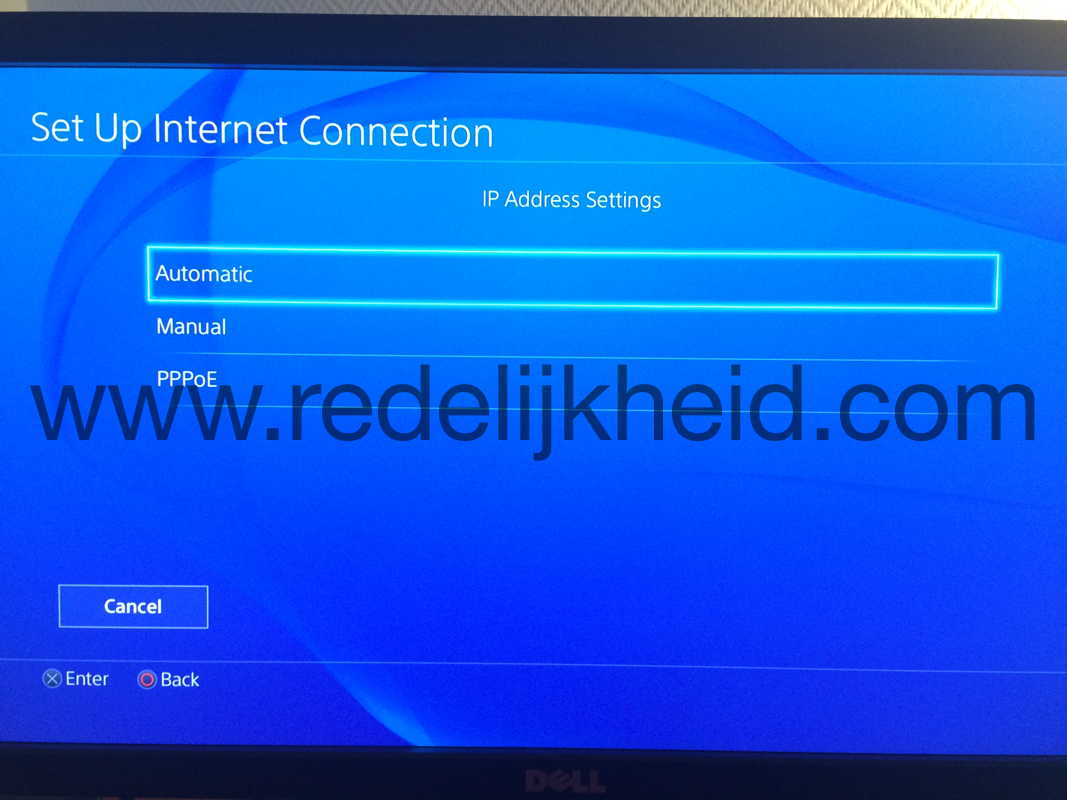
  3. Go to "Set Up Internet Connection".
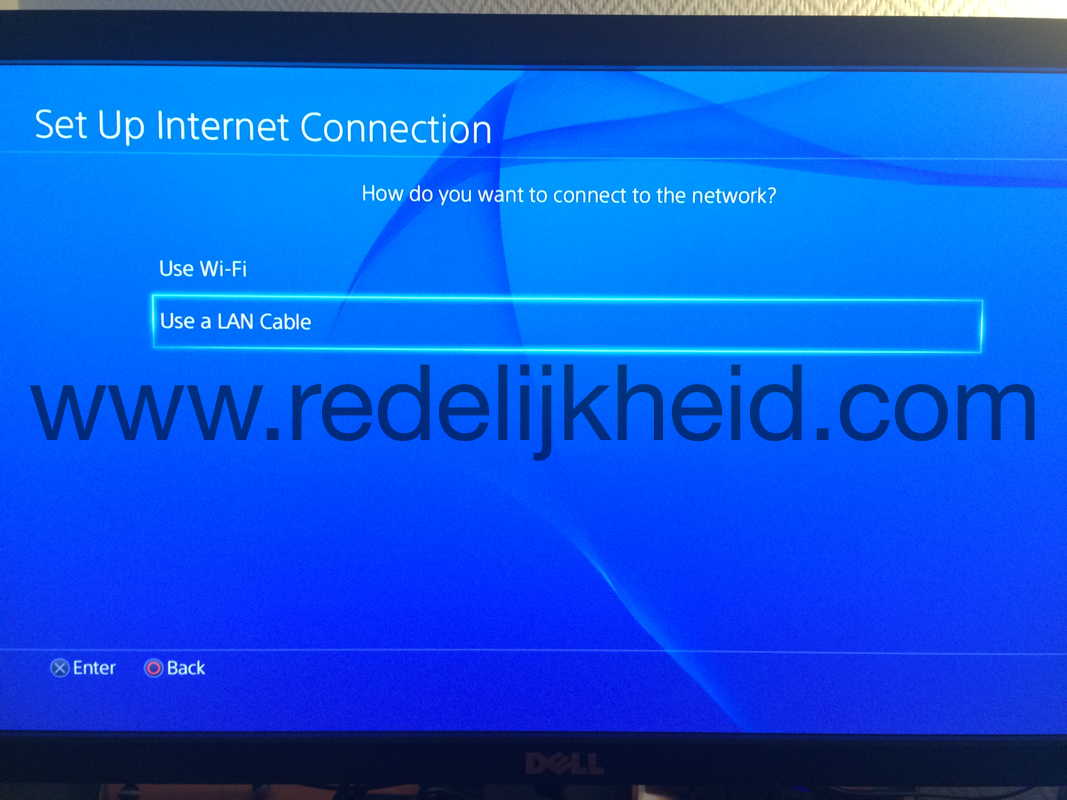
  4. Choose your media (WiFi or LAN).
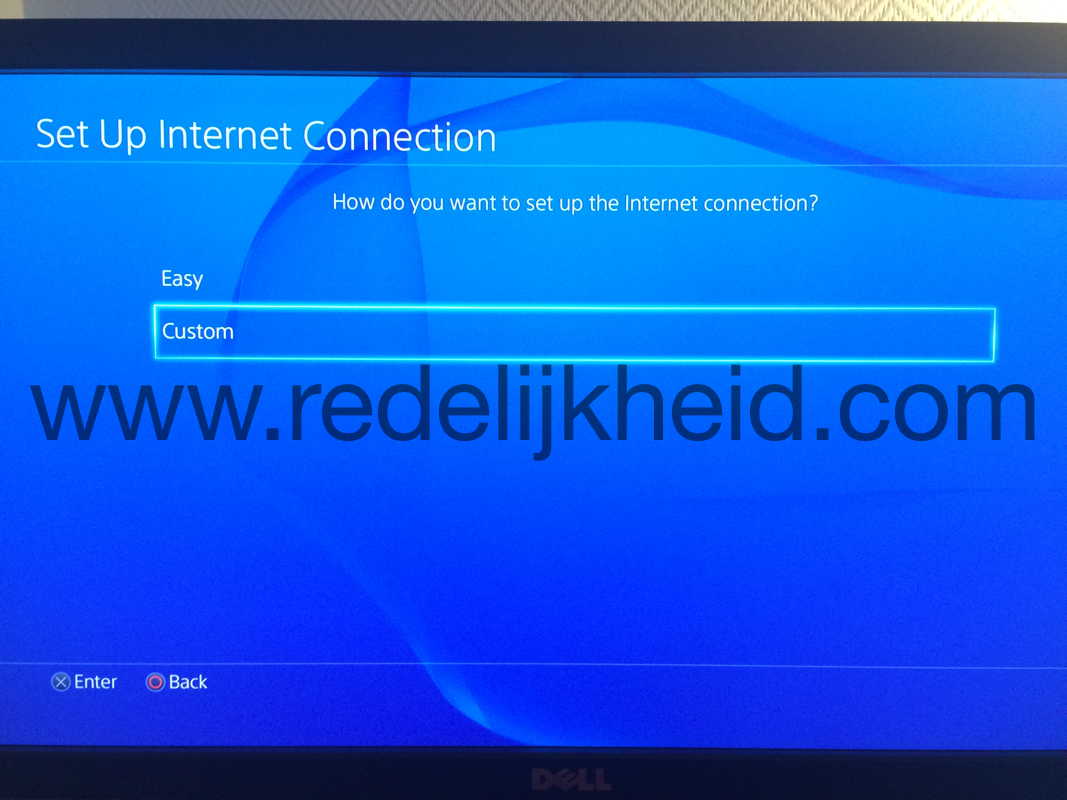
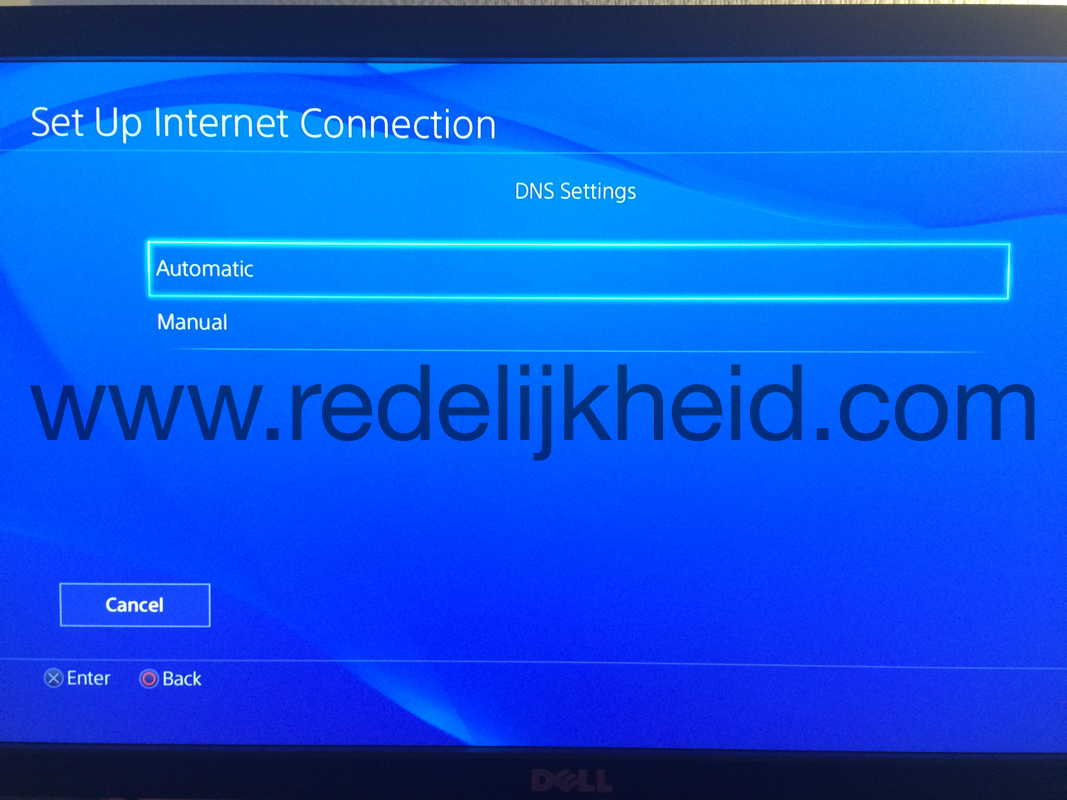
  5. Choose “Custom.”
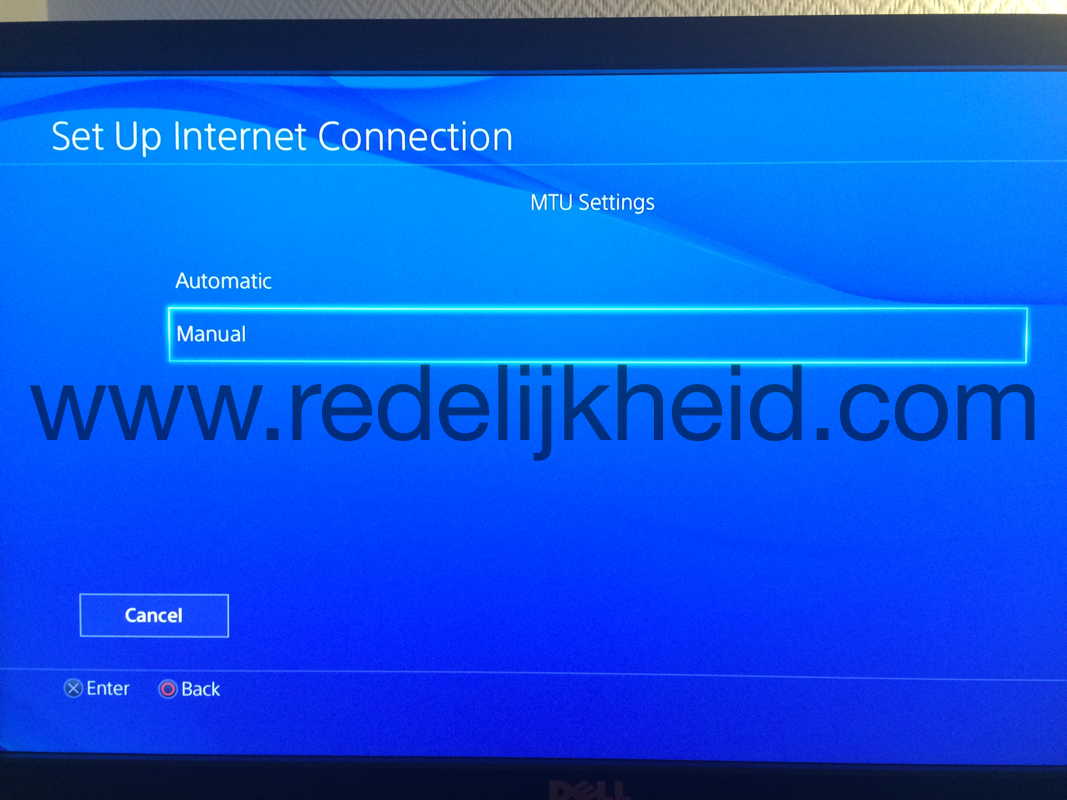
  6. Leave everything as default except MTU (Manual).
  7. Change MTU settings to “1473”.
  8. Save your changes.
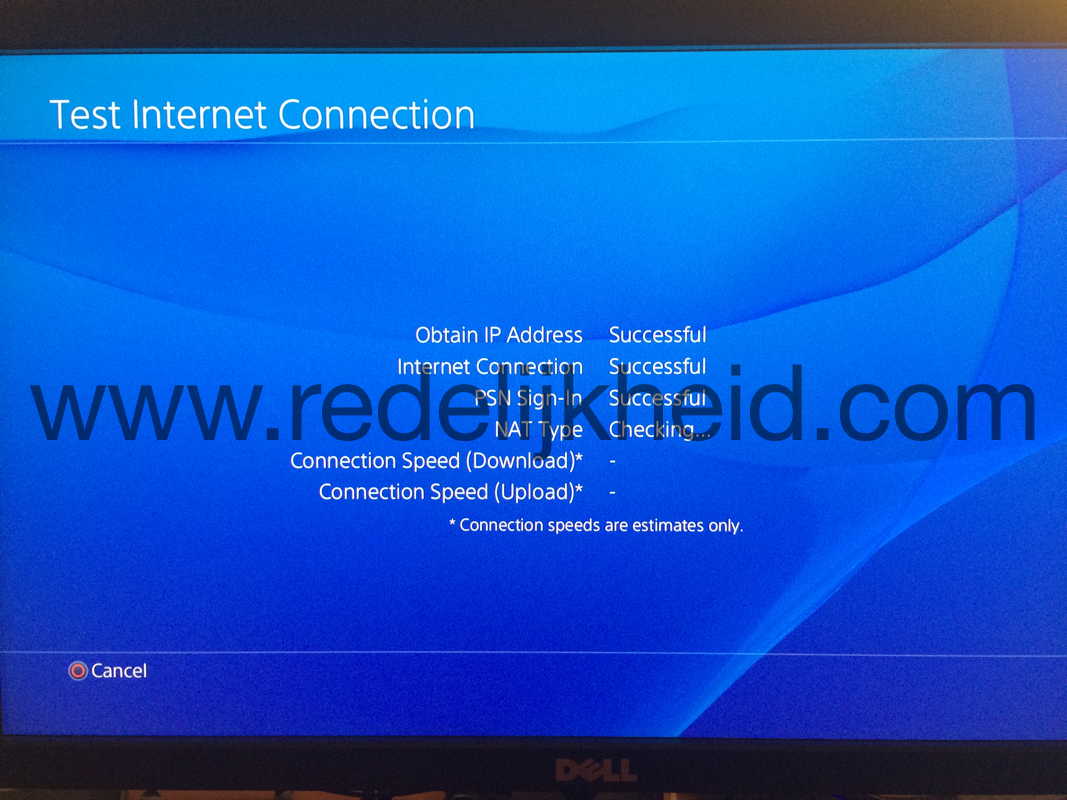
  9. Test the Internet connection.

And if you are more of a visual kinda person:

Everything should work now. If not, you may try a reboot.

Lowering the MTU size means that smaller packets are being send over the network (max. 1473 bytes instead of 1500 byte packets) , this is not a bad thing, but might lead to some performance problems in some cases. Just remember that you changed this setting. You want to (or have to) change this back to the default (1500) in the future.

I do not know if this works for other gaming devices. You may try at your own risk (and leave the results in the comments if you'd like).

UPDATE: As of this morning I was able to sign in to PSN with an MTU of 1500 (access the Playstation Store etc.), but I was unable to play online games (Battlefield 4). Changing the MTU back to 1473 fixed that (again).

UPDATE 2: As of this morning (31 december) I can also connect to PSN with an MTU of 1500, so everything is back to normal.

Posted on December 29, 2014 and filed under Annoying, Tips'n Tricks, Gaming.

Entering The World Of Android Based Media Players

This is gonna be a good one. An Apple Fanboy Going Android..... WTF!?

Yep, it's true to some extent. The reason for letting myself into the Android world is a media player one. Up till recent I was quite happy with my Popcorn Hour A-110, which I bought 6-7 years ago. Happiness started to fade when transfer speeds and connections to the device started to fail. Networking was never its strongest part, even though it had a 100mbps interface. For some reason it never got above the 10Mbps speeds. Had something to do with the processing priority of the device.

Anyway, lately, larger FTP transfers failed for whatever reason, and using SAMBA transfers.... well, don't get me started on that file transfer protocol. Sending communications by pigeon-mail is faster. And since streaming over the network was not an option for the larger (far less compressed) x264 encoded movies or TV shows, I started to look for an alternative.

The alternative should be able to connect to remote media sources, and have enough processing power for the network adapter to get decent a throughput. Also some additional multimedia features were on the 'very-nice-to-have' list. These features included (but were not limited to);

  • stream various content from the web
  • not limited to just video
  • easily modifiable (apps etc.)
  • prepared for the future (4k video?)
  • xbmc (or something alike)

With this list of requirements, there were about a gazillion candidates, because every player out there tends to support this. So I needed to narrow down the candidates. I did exclude the current Popcorn Hour because of the physical size of there latest models.

Posted on December 27, 2014 and filed under Gadgets, Hardware, Personal, Review, Tips'n Tricks, Video.

OSX 10.10 (Yosemite) and Audio Out Changes

Yesterday I ran into a new Yosemite feature that annoyed me a bit. After changing the input on my Dell 27" display from DisplayPort to HDMI, the screen turned black on my 27" iMac, and audio stopped. Forcing a reboot (holding the power button for >4 seconds) was needed to get the iMac's display back.

But from that point on, the audio was greyed-out in the menu bar. Changing the volume on the (Apple) keyboard gave a disabled icon on screen. Also, no audio was playing over my external speakers.

My first thoughts were that the earlier crash had corrupted something on my system, so I did an additional reboot. Nothing. After that a PRAM reset (power off, power-on and hold command-option-P-R until you have heard two start-up 'boings'). The start-up sounds were there, so the actual audio hardware was just fine.

When the desktop loaded still no audio control, until I unplugged my DisplayPort connector on the Dell 27" monitor. Audio (controls) came back instantaneous.

So, with DisplayPort connected to the external monitor: no audio (controls), and without the DisplayPort: audio (controls).

Turns out that with Yosemite, the audio is channelled BY DEFAULT over a DisplayPort connection (to a external monitor). In my case, the Dell also has an audio out connector, and I guess that is 'advertised' over the DisplayPort.

Changing the default behaviour is done in the System Preferences -> Sound

The first image shows the default (at least in my case). Changing the settings to the second image gave me back the audio and volume control.

I have no idea if this was also possible with Mavericks (or even earlier versions of OSX), but it's definitely a (default) feature that annoyes the hell out of me.

Even though I tackeled the audio problem, the issue with loosing the display when I change the video input on the external monitor still remains. But only if the desktop is extended to the second screen. It doesn't occur when the screen is mirrored.

Posted on November 18, 2014 and filed under Annoying, Apple, Operating Systems, Tips'n Tricks.

Why RAW instead of JPG?

The RAW file format holds much more information than you can see with your eyes. Sure, shooting in in JPEG leaves you with smaller size photos (in terms of storage), which results in more photos on your memory cards. This results in faster transfers to your PC, and Photoshop is more responsive to smaller files. So there are numerous occasions where JPEG seems more than enough, until you do need that (little) extra RAW information....

Just watch the following video.

Nuff said, I think.

Posted on September 29, 2014 and filed under Personal, Photography, Tips'n Tricks.

Long Exposure Photography With 16 Stops ND

A while back I investigated the possibility of using the Lee filter system on my Fujifilm X-T1. As you can see, I invested in two Lee ND filters;

  • Lee Big Stopper (110ND / 10 stops Neutral Density Grey filter)
  • Lee Little Stopper (106ND / 6 stops Neutral Density Grey filter)

The thing with ND filters is that they reduce the light evenly. This results in (depending on the greyness of the filter) longer exposure times. With enough 'stops' in front of your lens, you can stretch the exposure from 1/200s to 10 or 15 minutes. Shooting with exposure times of minutes instead of the usual fraction of seconds results in motion blur in the photos (assuming that you're not shooting a stationary object indoors). Expose long enough, and the movement becomes a silky haze.

Posted on September 29, 2014 and filed under Gear, Photography, Tips'n Tricks.

Apple OSX DHCP Server Challenges

The last week, I've been experimenting with the Juniper Mobility System Software (MSS) in conjunction with two Juniper/Trapeze Access Points (type WLA522E). The MSS software is a Wireless LAN Controller (WLC) with manages the Access Points, and like so many Juniper Product; it can run in a virtual machine.

For the AP's to boot / connect to the network they need some basic information about where to find the WLC from which they receive their wireless settings. This can be done through DNS, or through DHCP. The first uses specific DNS records, and the latter uses DHCP Options (option 43 to be precise). I wanted to use the latter (which is a bit more challenging).

Posted on August 25, 2014 and filed under Annoying, Apple, Tips'n Tricks.